Announcement

Collapse
No announcement yet.

Author challenged to name sources for ambush claims

Collapse
X
 
  • Filter
  • Time
  • Show
Clear All
new posts

  • #16
    Barry gave one account - Hart gave a flawed one

    It was Peter Hart, who anonymously interviewed a Kilmichael ambush participant six days after the last one died in November 1989, who claimed that Barry gave differing accounts. They reason Hart can't name the person he said he spoke to is because he was not talking to a member of the IRA corps, but to a corpse.

    Meda Ryan showed that Hart got it wrong on almost every detail, leaving out parts of documents he claimed to have found, that contradicted his theory, and so on.

    For instance Hart claimed that Barry invented the 'false surrender' story in 1949, and that he left it out of a 1932 Irish Press article. Ryan quoted a 1932 letter from Barry to the Editor of the Press, criticising the Press for editing out the account of the false surrender, and she quoted a 1942 An Cosantoir article by Barry, that mentioned it. In addition Ryan quoted early 1920's accounts of the false surrender, from British sources.

    No one questioned the 'false surrender' account, Irish or British, until Peter Hart found his anonymous sources, a British typed captured report of the ambush with key details wrong (details that Hart decided to hide from his readers), and his 1932 Irish Press account.

    Like the poster above, I believe Barry.

    See Meda Ryan's Tom Barry IRA Freedom Fighter (Mercier paperback 2005)

    This debate has been going on in the last four issues of History Ireland.

    See


    and


    The November December edition of History Ireland will have a review by Tim Pat Coogan of Hart's Mick

    Comment


    • #17
      Originally posted by Marksman
      They reason Hart can't name the person he said he spoke to is because he was not talking to a member of the IRA corps, but to a corpse.
      What's so unusual about that. Dead IRA men regularly vote in elections. So why not give interviews to historians.

      Meda Ryan had another letter on the same subject in yesterday's Examiner.

      http://www.irishexaminer.com/irishex...949-qqqx=1.asp

      22 May 2006

      It’s time to put names on ambush story sources

      IN his letter (Irish Examiner, May 6), Jack Lane drew attention to John Regan’s review of my book, Tom Barry: IRA Freedom Fighter (Mercier Press) where the reviewer stated that Peter Hart was “fortunate in finding survivors of the ambush alive and lucid nearly 70 years after the event… one of whom, he notes, visited the site with him”.

      Logistically, this creates a problem that only Mr Hart can solve. He says he interviewed two of the Kilmichael participants — ‘Rifleman AA’ in 1988 and ‘Scout AF’ in 1989.

      But according to biographical details, all scouts were dead by 1967, all dispatch scouts by 1971, and all after-ambush helpers and riflemen by November 19, 1989.

      Rifleman Jack O’Sullivan, the second last survivor, died in December, 1986.

      Rifleman Ned Young, the last and only known survivor alive in the late 1980s, was 97 when he died on November 13, 1989.

      Ned Young’s faculties were impaired in his last years, so it would not have been possible for him to travel to or relate events at the site without the knowledge of his family, among whom he lived for the last eight years of his life. They are unable to throw any light on this.

      However, if Mr Hart revealed the names of ‘AA’ and ‘AF’, the dilemma could be resolved. Keeping the names anonymous, as Jack Lane has pointed out, “makes the unravelling of the issue difficult”. Relatives of participants of the Kilmichael ambush (listed in my book), people in the locality and others would welcome the revelation of AA’s and AF’s identity now, more than 85 years after the ambush.

      Mr Hart needed interviews with these (anonymous) sources to back up his contention that there was a surrender, but no false surrender, at Kilmichael. In taking this stance, he accuses Barry of ordering the shooting of prisoners.

      Research shows that after the Volunteers accepted the surrender call and when the Auxiliaries reactivated the fight, fatally wounding Volunteers, Barry, the commander, took up the challenge. “We had to; if three or four more of our lads stood up, they’d have got it, too. I couldn’t take the chance they wouldn’t grab a gun”, said Barry, who never evaded accepting responsibility and spent a lifetime regretting not warning his men of “the old trick of a false surrender”. Because the Auxiliaries falsified their surrender call, they forfeited their position as prisoners, so it was a fight to the finish.

      In the recently released collection from the Bureau of Military History, Jack Hennessy (who was in Section 2 located near the three fatally wounded Volunteers) does not give relevant details or sequence of events, but states that when the Auxies got out of the lorries and into positions, he was one of the men “engaging them on the road”.

      Then, he says, “we heard three blasts of the O/C’s (Barry’s) whistle. I heard the three blasts and got up from my position, shouting ‘Hands up’. At the same time one of the Auxies about five yards from me drew his revolver. He had thrown down his rifle. I pulled on him and shot him dead. I got back to cover where I remained for a few minutes firing at living and dead Auxies on the road. The column O/C sounded his whistle again. Nearly all the Auxies had been wiped out”.

      This is a false surrender — after the ceasefire whistle was blown, an Auxie who had thrown down his rifle “drew his revolver”.

      Jack Hennessy’s recently released statement supports Barry’s false surrender account and the accounts from Crozier (Auxiliary O/C) and Curtis (adviser to Lloyd George), plus contemporary Irish writers, Beaslaí, O’Malley and McCann.

      Therefore, Mr Hart’s conclusion that Barry’s ‘history’ of the Kilmichael ambush is “riddled with lies and evasions” requires much more secure props than the support of anonymous sources.

      Tom Barry’s record of achievement stands, despite Mr Hart’s insistence that he was (a) “a minor character” and (b) “contributed little to the development of the IRA”.

      Meda Ryan
      Ennis
      Co Clare
      I thought the quotes from Jack Hennessy's statement to the Bureau of Military History were quite interesting. Jack makes no mention of an Auxiliary surrender, just Barry's ceasefire signal. Meda seems a bit put out that the Auxies failed to obey Tom Barry. Jack also states that he continued to fire at living and dead Auxies on the road. Fair enough he was in a firefight after all but lets face the fact that he was also shooting the wounded. And when the battle was over most of the Auxiliaries had been wiped out according to Jack. It's reasonable to extrapolate from this final statement that the survivors were killed after the fighting had ended.
      sigpic
      Say NO to violence against Women

      Originally posted by hedgehog
      My favourite moment was when the
      Originally posted by hedgehog
      red headed old dear got a smack on her ginger head

      Comment


      • #18
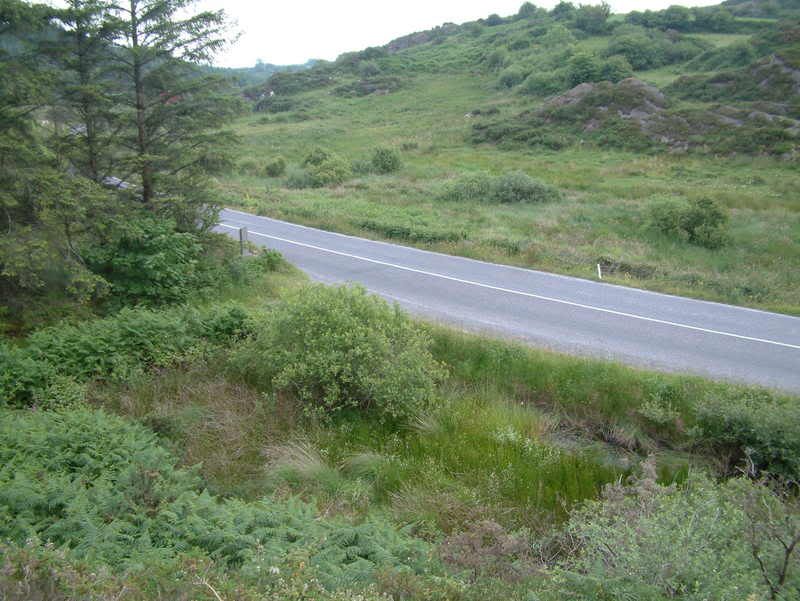
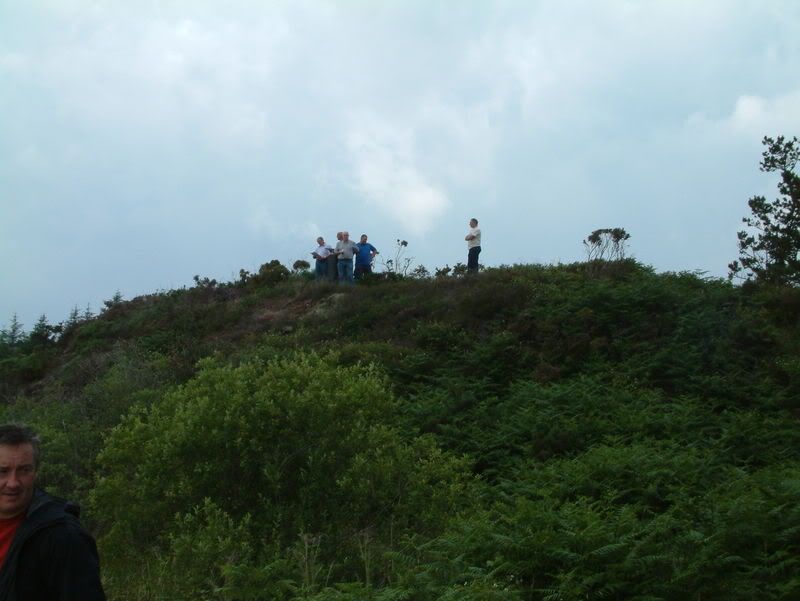
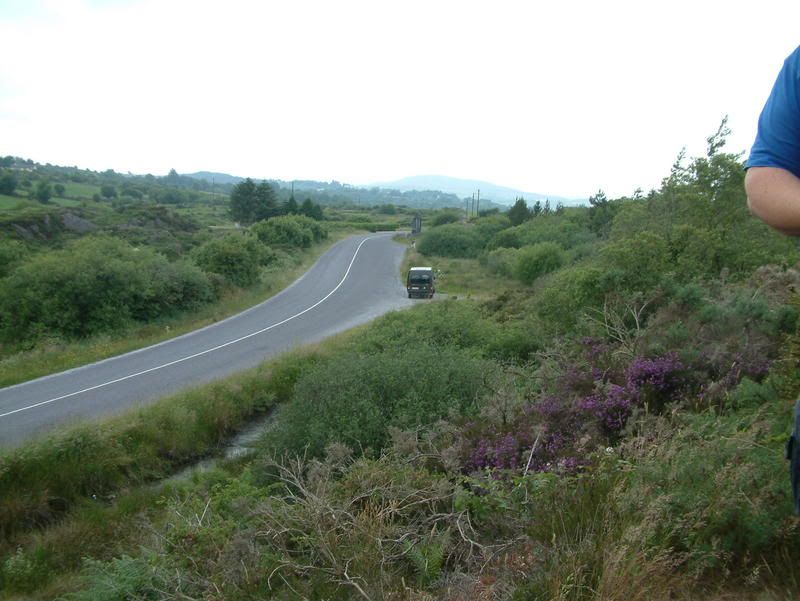
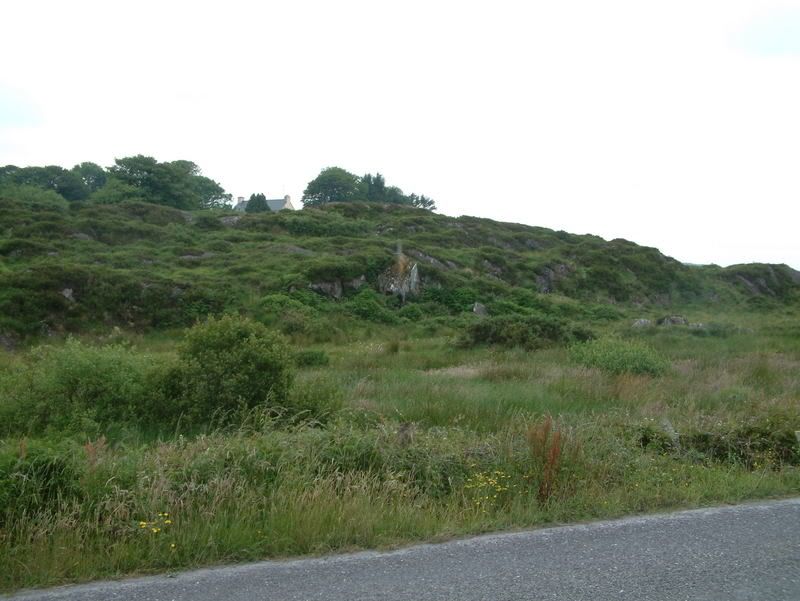
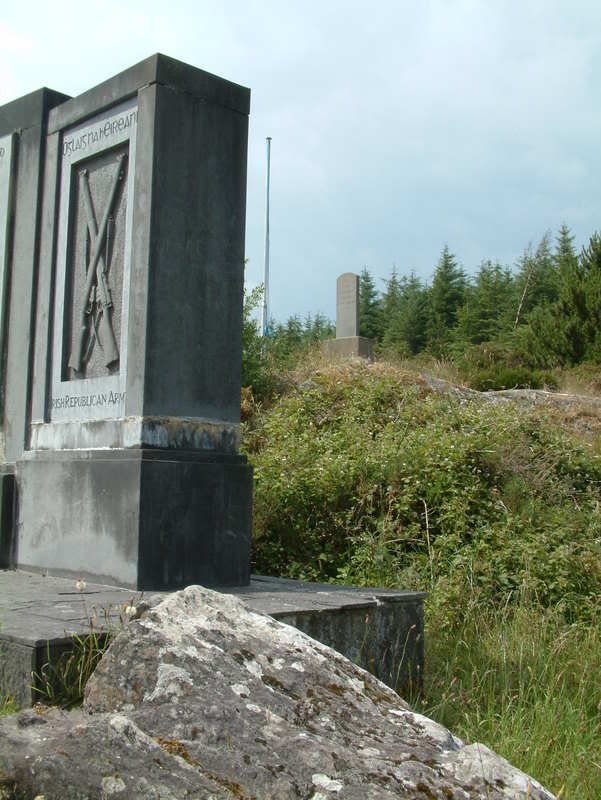
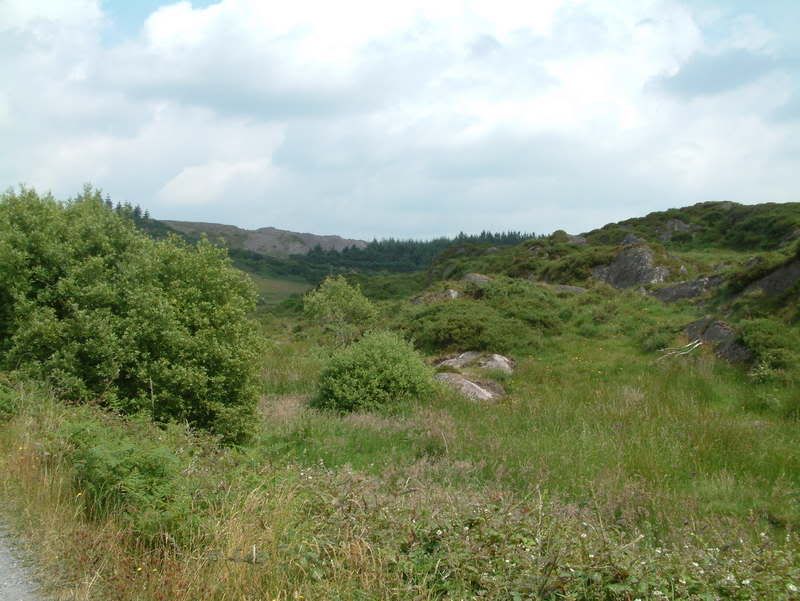
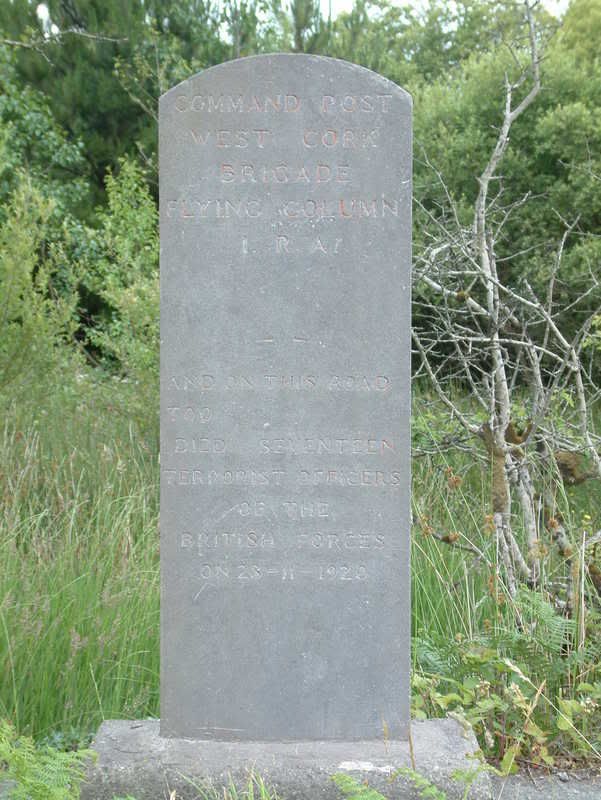
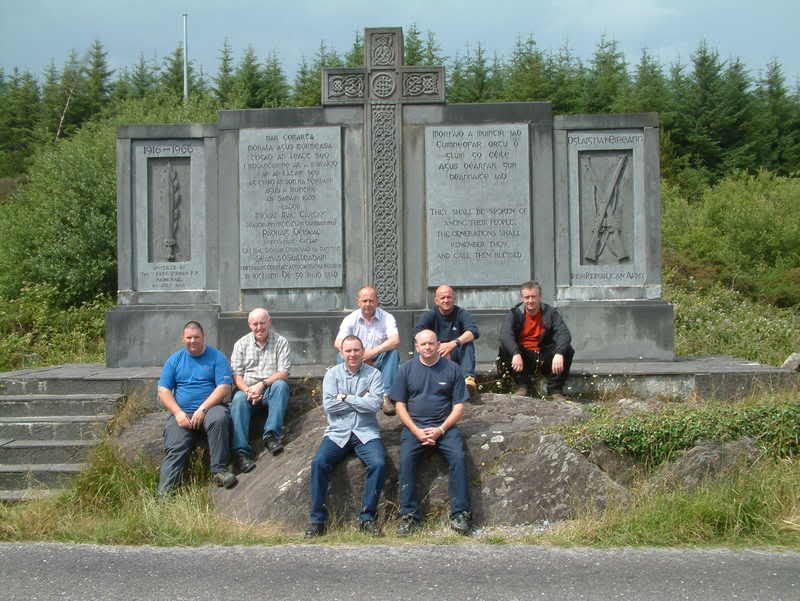
        As a matter of interest I'm going to reproduce Barry's account here and include some photos I took in June. Thye might be of interest to some of you. The site is well worth a visit because it is easy to "read" what happened there and the locations are well marked.


        The Kilmichael Ambush
        On 21st November 1920 a column of thirty-six riflemen was mobilised at Clogher, north-west of Dunmanway, for a week's training, in advance of an attack on the Auxiliaries from Macroom. At 2 a.m. on the following Sunday, the flying column of thirty-six riflemen fell in at Ahilina. Each man was armed with a rifle and thirty-five rounds. A few had revolvers, and the commander had also two Mills bombs, which had been captured in a previous ambush at Toureen. At 3 a.m. the men were told for the first time they were moving in to attack the Auxiliaries between Macroom and Dunmanway.
        The Column started its march in lashing rain and reached the ambush position at 8.15am. The ambush area was in the centre of a bleak and barren countryside, a bog land interspersed with heather and rocks. It was bad terrain for an ambushing unit because of the lack of roadside ditches and cover, but the Column had to attack in this area as there was no certainty of meeting the Auxiliaries anywhere except on this road between Kilmichael Cross and Gleann Cross which they never once failed to travel.
        The point of this road chosen for the attack was one and a half miles south of Kilmichael. Here the north-south road turns west-east for 150 yards and then resumes its north-south direction. There were no ditches on either side of the road but a number of scattered rocky eminences of varying sizes. No house was visible except one, 150 yards south of the road at the western entrance to the position.
        Before being posted, the whole Column was paraded and informed of the plan of attack. They were also told that the positions they were about to occupy allowed for no retreat and would be a fight to the end, All the positions were pointed out to the whole Column, so that each man knew where his comrades were and what was expected of each group.
        Details of the plan were as follows –

        The Command Post seen from No 1 Section's Position. Tom Barry stood on the road by the marker stone and initiated the ambush by throwing a grenade at the first lorry.

        The Command Post was situated at the east end of the ambush facing the oncoming lorries. It was located behind a small wall and manned by three men- John Nyhan, Mick O’Herlihy and Jim Murphy. From here the ambush would be initiated.

        · No 1 Section's Position from the Command Post.
        No. 1 section consisting of of ten riflemen was placed behind a
        large heather-covered rock, ten feet high, about ten yards from the
        Command Post. This rock was a few yards from the northern edge of
        the road. By moving up on the crest of the rock as soon as the action
        commenced, the Section would have a good field of fire.

        No 2 Section's Position from the Command Post. At the bend in the road where the monument stands. It was here that the second lorry stopped and where the false surrender allegedly took place.
        · No. 2 section commanded by Michael McCarthy and also of ten riflemen occupied a rocky eminence at the western entrance to the ambush position on the northern side of the road, and about one hundred and fifty yards from No. 1 section.
        ·

        No 3 Sections Position, on the crag centre photo.
        No the road under command of Stephen O’Neill. The section was split into two groups. O’Neill and six riflemen occupied a chain of rocks and their task was to prevent the Auxiliaries occupying firing positions here.
        · The remaining six riflemen of No. 3 section had to be used as an
        insurance group. There was no guarantee the enemy would not include
        three, four or more lorries. Some riflemen, no matter how few, had to
        be ready to attack any lorries other than the first two. These men were placed sixty yards north of the ambush position, about twenty yards from the roadside. From here they could fire on a stretch of two hundred and fifty yards of the approach road.
        · Two unarmed scouts were posted one hundred and fifty and two hundred yards north of No. 2 section, from where they were in a position to signal the enemy approach when nearly a mile away. A third unarmed scout was a few hundred yards south of the command post to prevent surprise from the Dunmanway direction.
        All the positions were occupied at 9 a.m.
        From the nearby house food and a large bucket of tea was sent but there was not enough for all. The men's clothes had been drenched by the previous night's rain and now it was intensely cold as they lay on the sodden heather. The hours passed slowly. Towards evening the gloom deepened over the bleak Kilmichael countryside. Then at last at 4.05 p.m. a scout signalled the enemy's approach.
        The first lorry came round the bend into the ambush position at a fairly fast speed. The column commander Tom Barry, dressed in a military style uniform stepped onto the road with his hand up. The driver of the lorry, seeing the uniformed figure, gradually slowed down. When it was thirty-five yards from the volunteers command post a Mills bomb was thrown by Barry and simultaneously a whistle blew signalling the beginning of the assault. The bomb sailed through the air to land in the driver's seat of the un­covered lorry. As it exploded the rifle shots rang out. The lorry, its driver dead, moved forward until it stopped a few yards from the small stone wall in front of the command post. While some of the Auxiliaries were firing from the lorry, others were on the road and the fight became a hand-to-hand one. Revolvers were used at point blank range, and at times, rifle butts replaced rifle shots. The Auxiliaries were cursing and yelling as they fought, but the I.R.A. coldly outfought them. In less than five minutes all nine Auxiliaries were dead or dying sprawled around the road, except the driver and another who were lying lifeless in the front of the lorry.
        The second lorry had stopped and was coming under fire from No. 2 section. The Auxiliaries were lying in small groups on the road returning fire. Three riflemen from the command post, Murphy, Nyhan and O'Herlihy, moved in to attack the second party from the rear when they heard the Auxiliaries shout "We surrender". Some of them were seen to throw away their rifles. Firing stopped and three of the volunteers in No. 2 Section stood up. The Auxiliaries began firing again with revolvers and two of the three men fell.
        Last edited by Groundhog; 30 September 2006, 00:16.
        sigpic
        Say NO to violence against Women

        Originally posted by hedgehog
        My favourite moment was when the
        Originally posted by hedgehog
        red headed old dear got a smack on her ginger head

        Comment


        • #19
          When he saw this Tom Barry gave the order, "Rapid fire and do not stop until I tell you". The Auxiliaries once again shouted "We surrender" but on this occasion the order was given "Keep firing on them. Keep firing, No. 2 Section. Everybody keep firing on them until the Cease Fire".

          No 2 Section's Positon seen from the road where the second lorry was located. The fighting here was at ten yards range.

          The small I.R.A. group on the road was now standing up, firing as they advanced to within ten yards of the Auxiliaries. When the cease fire order was finally given there was an uncanny silence as the sound of the last shot died away. Sixteen Auxiliaries were dead and one seriously wounded. Volunteers Michael McCarthy, Dunmanway and Jim Sullivan, Rossmore also lay dead, and Pat Deasy was dying.
          The lorries were set ablaze. Like two huge torches, they lit up the countryside and the corpse-strewn road. Some of the volunteers showed the strain of the ordeal through which they had passed, and a few appeared on the point of collapse because of shock. The entire column was ordered to drill and march and for five minutes the eerie drill continued. They then halted in front of the rock where Michael McCarthy and Jim O'Sullivan lay, where they presented arms as a tribute to the dead volunteers. Just thirty minutes after the opening of the ambush the column moved away to the south, intending to cross the Bandon river upstream from the British held ManchBridge. Eighteen men carried the captured enemy rifles slung across their backs. It started to rain again and the men were soon drenched. The rain continued as the I.R.A. marched through Shanacashel, Coolnagow, Balteenbrack and arrived in the vicinity of dangerous ManchBridge. The BandonRiver was crossed without incident and Granure, eleven miles south of Kilmichael, was reached by 11 p.m.
          The following day the volunteers remained at the cottage where they had billeted while reports of intense enemy activity came in. Large forces of British were gathering at Dunmanway, Ballineen, Bandon, Crookstown and Macroom before converging on Kilmichael. One unit of 250 steel-helmeted soldiers moving on to Dunmanway about noon, passed two hundred yards from the cottage. Other enemy units were moving at the same time a few miles away on to ManchBridge. No risks were taken by them as it was nearly 1 p.m. when all their forces reached Kilmichael. The British were aware at 6 p.m. on the Sunday evening that the Auxiliaries had been ambushed, yet it was late evening on the following day before they ventured to the scene of the fight. British forces converging on Kilmichael, carried out large scale reprisals around the ambush area. Shops and homes and farms were destroyed at Kilmichael, Johnstown, Inchigeela and other areas.


          No 3 Section's Position seen from the location of the false surrender. A recipe for a blue on blue.


          The marker stone at the Command Post.
          Last edited by Groundhog; 30 September 2006, 00:26.
          sigpic
          Say NO to violence against Women

          Originally posted by hedgehog
          My favourite moment was when the
          Originally posted by hedgehog
          red headed old dear got a smack on her ginger head

          Comment


          • #20


            The Kilmichael Monument
            sigpic
            Say NO to violence against Women

            Originally posted by hedgehog
            My favourite moment was when the
            Originally posted by hedgehog
            red headed old dear got a smack on her ginger head

            Comment


            • #21
              Groudhog,

              Many thanks for this reminder of Barry's account in his book. I also visited the site and the pictures bring back memories of the day and the very graphic description of the event that we were given by our guide. He explained that one of the auxies, although wounded, managed to escape and make it to a neighbouring farmhouse. He was reported to the local intelligence officer and captured and executed in a cowshed some time after the ambush. He was listed as MIA for years by the british until his grave was revealed years later to investigators.

              The point of this post is to ask anyone if they can provide a similar reconstruction of the engagement at Crossbarry. This was the action that most engaged my interest. If it was anything like the version recorded by Barry then it is far more significant. The Kilmichael ambush is significant because it was a first in scale and planning and because it destroyed what was considered an elite unit. The auxies were regarded at that time much as the SAS would be regarded today.

              However the Crossbarry action involved far greater numbers on both sides and revealed a growing sophistication and maturity on the Irish side. Barry also alludes to a reluctance on the british side to publish alist of casualties as it would have been embarrasing.

              My questions are:

              1) How accurate is Barry's account of the engagement at Crossbarry?

              2) Has the list of British casualties on the day ever been made public in subsequent years?

              3) How significant was the evidence of the IRA's ability to engage in company level engagements in the British Government's decision to call a truce and engage in negotiations?

              As I say if Barry's account of Crossbarry is in any way accurate, I feel that is very undervalued. Maybe someone could oblige with the account plus pictures if available.
              Last edited by Sluggie; 30 September 2006, 15:03.

              Comment


              • #22
                Originally posted by parkman View Post
                I read somewhere that Sean McKeown CO of the Mayo flying colum treated all prisoners fairly and saw to it that the wounded were attended to.
                I find that hard to believe, can you clarify where you saw that?
                As the IRA had no facilities for holding prisoners and could not entertain the threat of identification, it is my understanding that prisoners were usually shot soon after capture.

                Comment


                • #23
                  The photos make it a lot easier to visualise, thanks groundhog

                  Comment


                  • #24
                    Hi all
                    My late grandfather was an unarmed spotter for the IRA at the Rineen Ambush, near Miltown Malbay in County Clare. His account of the positioning of the ambush party and the spotters was very,very close to that of Barry's account, i.e, they were positioned in rough terrain, with a commanding view of the road, with a full briefing having taken place in advance. The spotters, boys of 16 or so, were under strict orders not to show themselves after the firing had started, until the Cease Fire had been called. After the fight was over, he and his fellow spotters were called down to the scene and he graphically described the wounds of the dead. The condition of the dead remained with him to the end. The impact of bullet wounds were brought home vividly to them all. They collected the weapons, including, he claimed, a Lewis Gun, and retreated into the countryside.It seemed to have been common policy to torch the trucks as they could not be taken. As for the shooting of prisoners, he said that whilst it was regarded as a necessary act, for obvious reasons, it was disliked as it encouraged reprisals and was regarded as unfair to shoot men who had put up a good fight, especially since many were of Irish origin. It was also policy not to attack enemy columns of greater than two or three trucks, as they could rarely put more than two sections of IRA in the field.
                    Subsequently, as an aside, the Lewis Gun didn't last long as it ate up the available ammunition and was unreliable and hard to get spares for.
                    With regard to Tom Barry's attitude to other people's version of events, my granddad regarded TB, and others, as show-offs, given that so many of them never spoke of their IRA service thereafter. He was also scornful of those who claimed IRA pensions in later years. It was funny to see and hear him read the Examiner and Echo, for the death notices, and loudly castigate some recently departed ex-IRA (or at least, claimed to be) man, as a "blaggard!". He once showed me his Old IRA medal, of which he was quietly proud and said that he had earned his the hard way, unlike some.
                    regards
                    GttC

                    Comment

                    Working...
                    X